This guide uses an awesome project created by Renaud Cerrato. It’s a simple Maven repository that runs on Google App Engine and supports user accounts for controlling read/write access.
It’s a faster alternative to deploying your own Artifactory instance. And it’s less expensive than private Maven repository hosting services, like Bintray and JitPack.
Should take less than 15 minutes to setup. Under App Engine’s free quotas, you can store up to 5 GB of artifacts and use up to 1 GB of data transfer bandwidth daily. Note that Google App Engine HTTP requests are limited to 32 MB - and thus, any artifacts above that limit can’t be hosted.
I’d say this is best suited for personal or small group projects.
Setup server
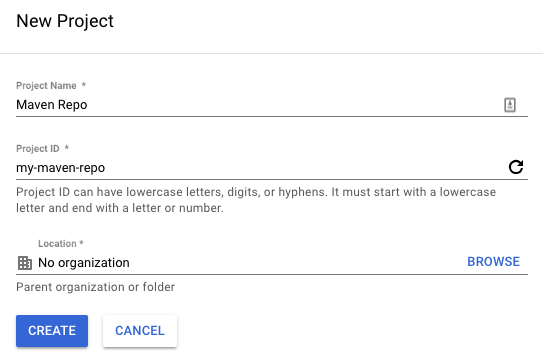
From your Google Cloud console, create a new project:
Configure server
Step 1
Clone the source code:
$ git clone https://github.com/renaudcerrato/appengine-maven-repository.git
Step 2
Edit the /WEB-INF/appengine-web.xml file and replace your-app-id with the Project ID you used to create your Google Cloud Project.
Step 3
Update the /WEB-INF/users.txt with user credentials and permissions
# That file declares your users - using basic authentication.
# Access control is provided through the following permissions:
# write, read, or list.
#
# Syntax is:
# <username>:<password>:<permission>

admin:l33t:write
john:j123:read
donald:coolpw:read
guest:guest:list
Deploy server
Once your project has been configured, just push the application to Google App Engine:
$ cd appengine-maven-repository
$ ./gradlew appengineUpdate
That’s it! You can access your repository at https://<yourappid>.appspot.com
Note – the first time you deploy your project, a browser page will pop up asking you to authorize the Gradle App Engine plugin to access your Google Cloud account.
Publish artifacts
Configure publishing and list your repository URL, username and password in your project’s build.gradle file. See the Gradle docs for advanced usage.
apply plugin: 'java'
apply plugin: 'maven-publish'

...

publishing {
    publications {
        maven(MavenPublication) {
            groupId 'com.example'
            artifactId 'project1-sample'
            version '1.0.0'

            from components.java
        }
    }
    repositories {
        maven {
            url "https://<yourappid>.appspot.com"
            credentials {
                username 'admin'
                password 'l33t'
            }
        }
    }
}
Finally, deploying is as simple as running:
$ ./gradlew publish
Access artifacts
To access your published artifacts, just add your new Maven repository to your project’s build.gradle file:
repositories {
    ...
    maven {
        credentials {
            username 'john'
            password 'j123'
        }
        url "https://<yourappid>.appspot.com"
    }
}
And then list your artifact as a dependency, using the groupId, artifactId, and version you had specified earlier.
dependencies {
    compile 'com.example:project1-sample:1.0.0'
}